
Mar 3, 2017Making Progress, Part II
Last week, I began a discussion on what exercises should make up the majority of training and how to properly progress young athletes through them. As I mentioned, my philosophy on this topic stems from world renown strength coach Dan John.
Previously, I gave a detailed look at the first two of the five exercises: squats and hinge exercises. Below, I’ll detail the remaining ones.
But before I go into details, two notes:
- All athletes progress at different rates. Do not be afraid to keep someone at an exercise for a longer period of time.
- Be prepared to regress athletes throughout the course of the year. During periods of training layoffs or injuries be prepared to take a step back to reset each pattern.
Category 3:
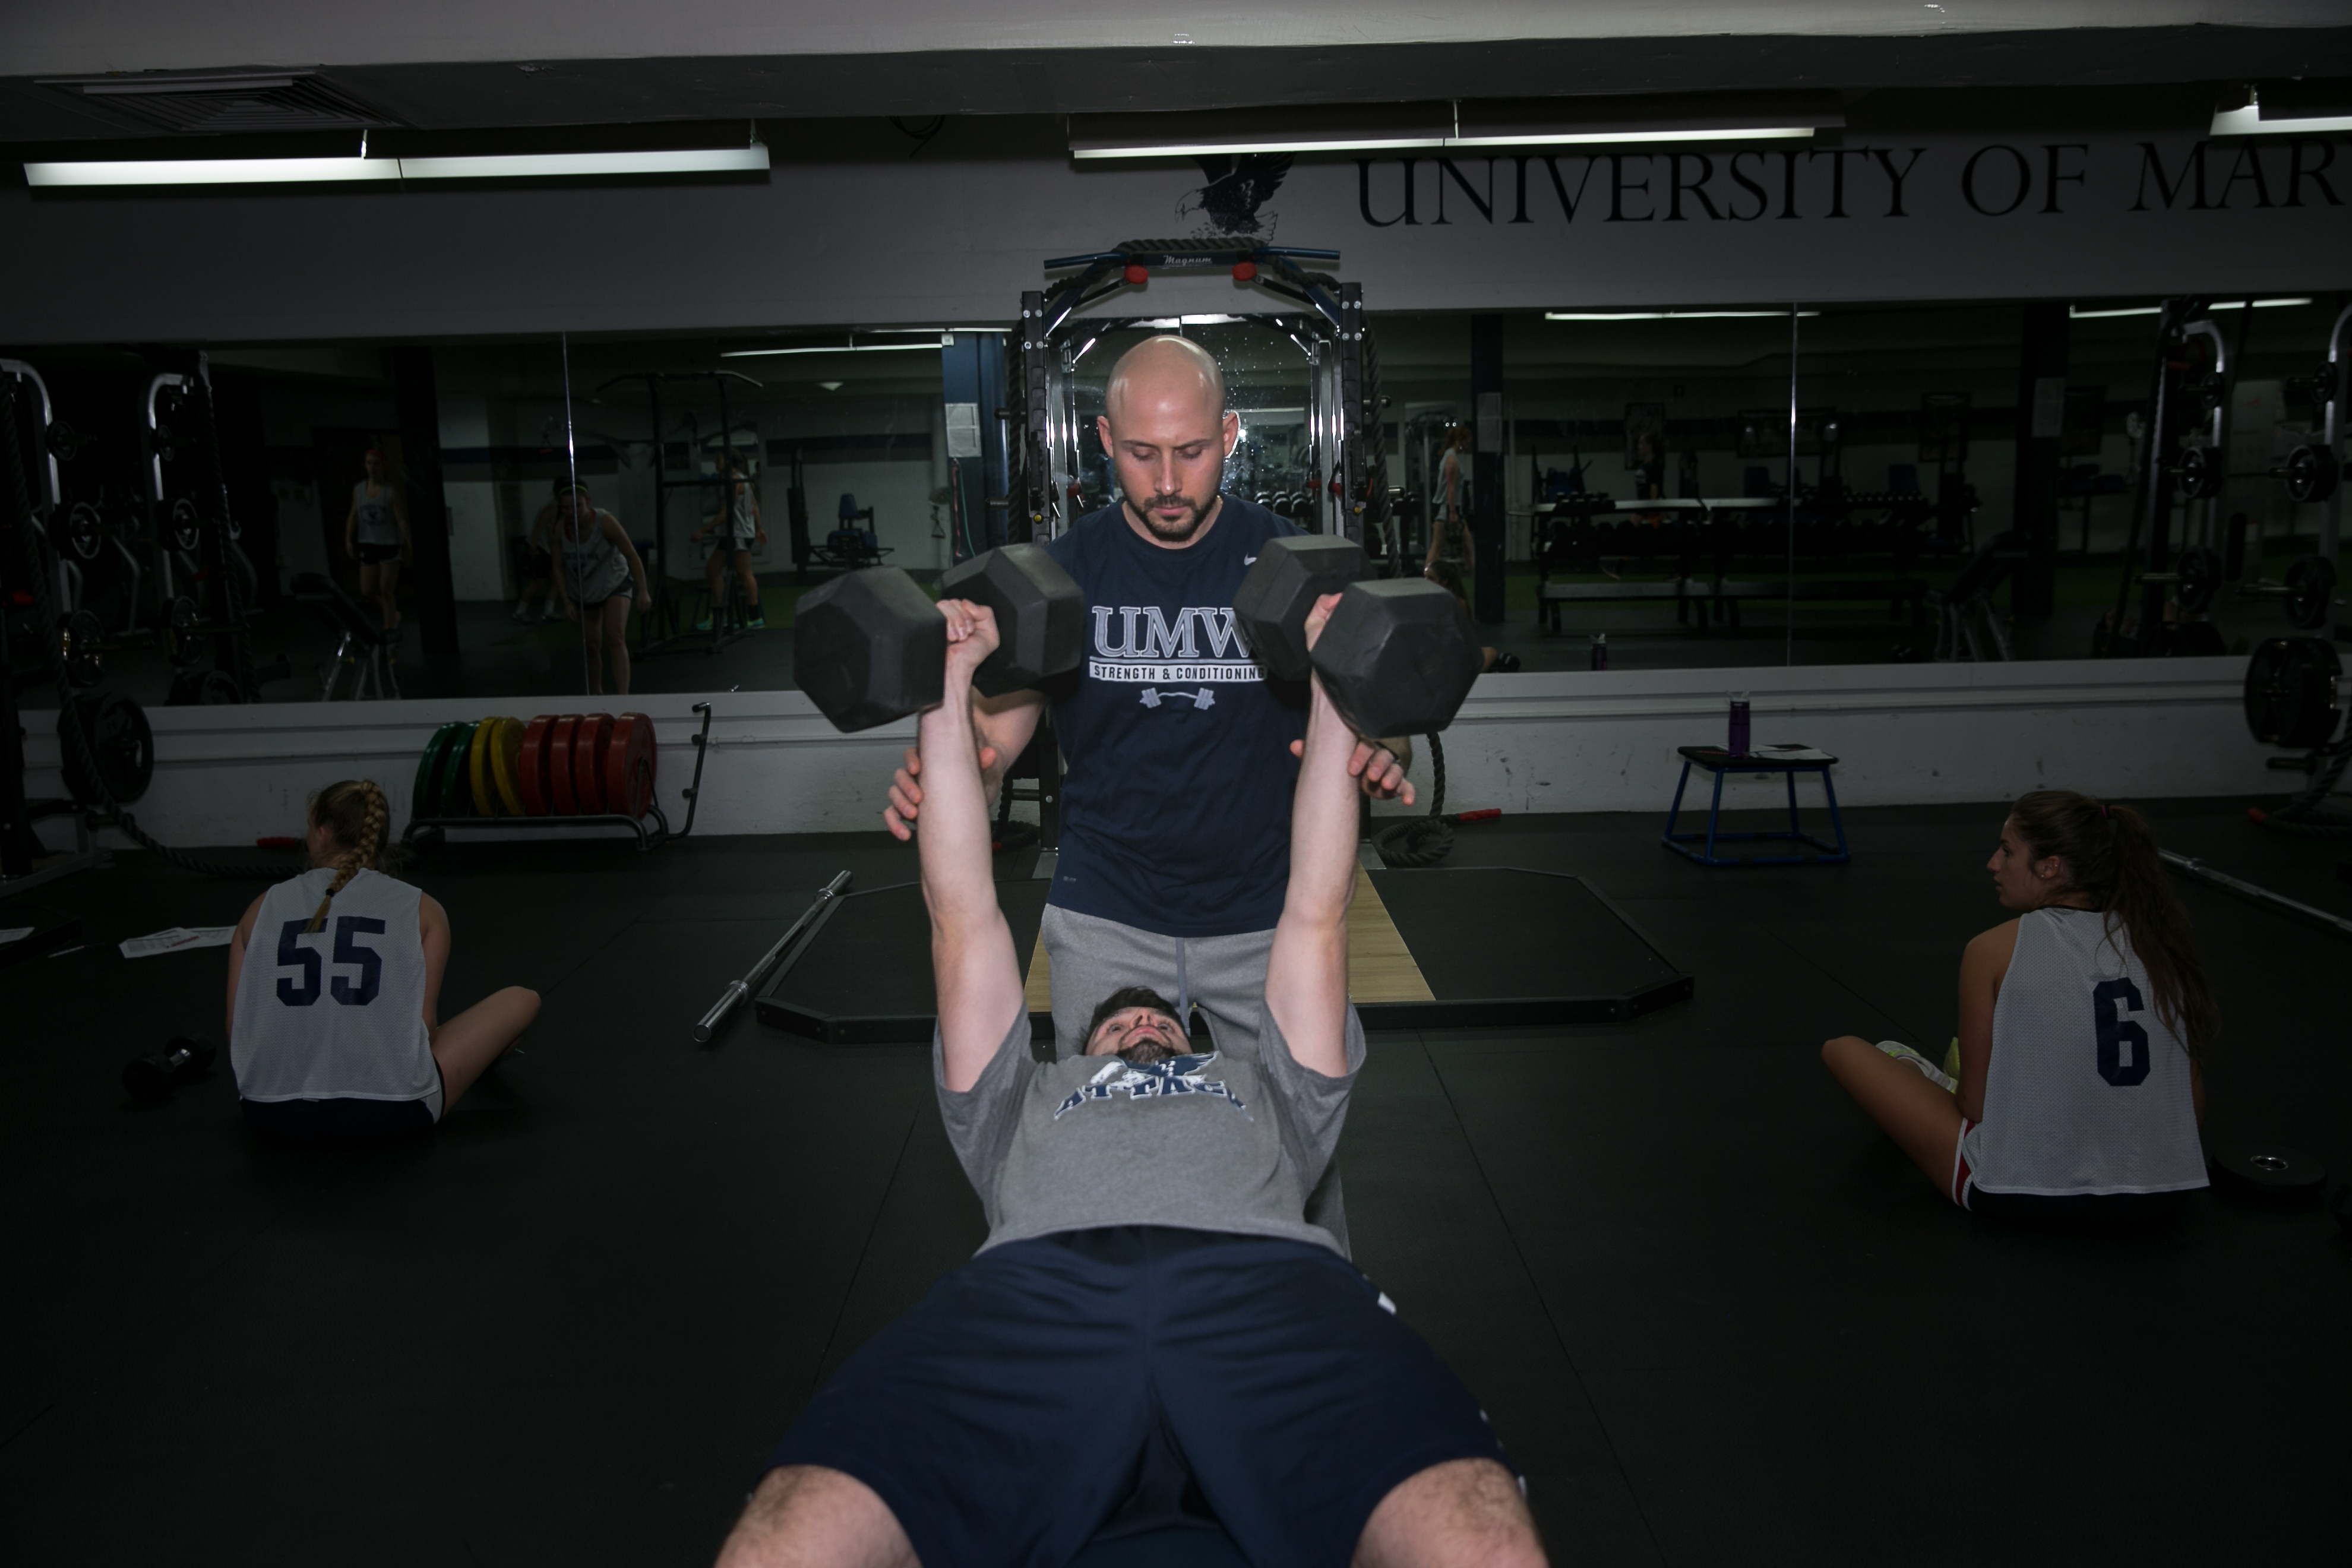
Vertical and Horizontal Push: The push category is made up of both horizontal and vertical variations. Below will be progressions for each. One of the most important cues you should use when coaching any pressing movement is to keep your elbows in. Most athletes tend to flare their elbows out, which puts more pressure on the shoulder.
Weeks 1-3:
Vertical Push: Seated Dumbbell Military Press: The seated dumbbell military press is a great place to start because the back support allows you to focus on the movement pattern without the core stability needed for the standing variation.
Horizontal Push: Push-ups: The push-up is an underrated exercise that is often done incorrectly. The key is the keep your elbows in tight to your body and maintain a flat back throughout the movement. If an athlete cannot perform this exercise correctly have them go from their knees.
Weeks: 4-6:
Vertical Push: Standing Dumbbell Military Press: Continue to cue the athletes to keep their elbows in during this movement. Keep in mind the standing variation will require more core control. Cue the athlete to squeeze their glutes and push their head through at the top once their elbows are locked out.
Horizontal Push: Dumbbell Bench Press: During the dumbbell bench press instruct the athletes to keep a neutral grip and tuck their elbows in the same way they did in the push-up. Dumbbells are a great way to pick up any imbalances from one arm to the other so keep your eye on them as they complete each rep.
Weeks 7-9:
Vertical Push: Standing Barbell Military Press: Cue the lift the same way as with the dumbbell variation and continue to emphasize pushing their head through at the top. A good cue is “put your head through the open window.”
Horizontal Push: Single Arm Dumbbell Bench Press: This variation is done with one dumbbell with the free hand empty. This requires more core control and stability then the double hand variation so instruct the athlete to brace and keep their core tight throughout each rep.
Week 10-12:
Vertical Push: Push Press: The push press requires the same set up at the standing military press. However, it includes a quick dip in the legs at the start, making it a more explosive movement. A good cue is, “Dip and Drive,” and instruct the athlete to hold the lockout with each rep to improve shoulder stability.
Horizontal Push: Bench Press: The bench press is probably the most popular exercise on the planet. As I’ve previously stated, keeping the elbows in is extremely important and instruct the athletes to grip the bar at shoulder width. It’s also important to coach your athletes on how to grip the bar properly. A lot of athletes tend to perform a thumbless grip, which can be a recipe for disaster. Without proper grip on the bar it can easily slip out of their hands and cause serious injury, and in some cases death. A spotter should be used at all times regardless of the amount of weight on the bar.
Category 4:
Vertical and Horizontal Pull: The pull category consists of both vertical and horizontal variations. A common problem I see with programs is they tend to over push and under pull. Having a balanced program of pulls to pushes will help avoid shoulder injuries and ensure your athletes are developing their entire upper body. When putting together a program I like to include two pulls for every one push.
Weeks 1-3:
Vertical Pull: Lat Pull Down: This variation will help strengthen the lats and develop the foundation for the pull-up variations that follow. A common issue I see with the lat pull down is athletes tend to swing backward and pull the bar down towards the middle of the stomach. During this movement, the athlete should keep his/her chest upright and pull the bar down towards the clavicle without swinging.
Horizontal Pull: Chest supported Dumbbell Row: For this exercise set a bench up on an incline and have the athlete put their chest against the bench. As they row the dumbbells up have them squeeze their shoulder blades together at the top. The support at their chest helps the athlete gain comfort with what a row should feel like when done correctly.
Weeks 4-6:
Vertical Pull: Eccentric Chin-Ups: The eccentric chin-up is a great way to get athletes comfortable and strong enough to perform chin-ups with their own body weight. Set a box under the athlete’s feet and have them jump up with their chin above the bar using an underhand grip. Have them slowly come down for 4-6 seconds until their elbows lock out. Once they complete a rep have them jump back up and repeat the movement.
Horizontal Pull: Single Arm Dumbbell Row: The single arm dumbbell row can be done on a bench or leaning against a rack or unmovable object. The free hand is used as a support while the athlete rows with the opposite hand. Instruct the athlete to keep a flat back and control the dumbbell throughout the course of the movement.
Weeks 7-9:
Vertical Pull: Chin-ups: After a few weeks of eccentric chin-ups, most athletes can begin to perform these movements for a few reps on their own. Keep in mind athletes progress differently and a good regression to the chin-up is a band or partner assisted chin-up.
Horizontal Pull: Barbell Bent Over Row: The barbell bent over row goes hand in hand with the hinge pattern at this stage. Instruct the athlete to hinge down like they are doing an RDL and maintain a flat back before pulling the barbell in towards their stomach. Cue the athlete to avoid pulling the bar up towards their chest.
Weeks 10-12:
Vertical Pull: Pull-Ups: Pull-ups are done with an overhand grip and require more lat strength then the underhand variation. If an athlete at this stage can do 10-12 reps on their own without assistance you can also begin to add additional weight to the exercise.
Horizontal Pull: Pendlay Row: The Pendlay row is done with the barbell on the floor. The athlete sets up like they are going to perform a deadlift and maintains a perfectly flat back. Just like the bent over row, they pull the bar towards their stomach. However, they reset the bar back down on the floor following each rep with their back in the same position. When done correctly this exercise also hammers the posterior chain as it works to stabilize during each rep.
Category 5:
Loaded Carries: The last category on this list is loaded carries. These variations give you tremendous bang for your buck including grip strength, core strength, shoulder strength and stability, and improved posture.
Weeks 1-3:
Doublehand Carries: For this exercise, instruct the athlete to hold a kettlebell or a dumbbell in each hand while keeping their chest up and shoulders back. Pick a distance that is challenging yet manageable for them to maintain their posture throughout.
Weeks 4-6:
Suitcase Carries: This movement is similar to the doublehand carry except you are carrying one dumbbell or kettlebell like a suitcase. Cue the athletes to keep the dumbbell off of their leg and to walk “normal” without tilting to one side. If done correctly athletes will report feeling this exercise across their core.
Weeks 7-9:
Front Rack Carries: Instruct the athletes to hold a kettlebell in each hand in the front rack position (The start of the kettlebell front squat). Emphasize keeping a tall chest the entire length of each set.
Weeks 10-12:
Overhead Carries: The overhead carry is done with one dumbbell or kettlebell overhead and one hand free. Instruct the athlete to keep their elbow locked out the entire time and to start lighter to get comfortable with this movement.
As you start to think about putting together a program for your athletes, my suggestion is to begin with three days per week and hit each of these patterns during every session. Think about weight lifting like practice. If you wanted to change an athlete’s jump shot you would likely have them practice it each session. The same goes for these exercises. If you reduce the intensity and allow them to focus on the movements, they will end up comfortable and confident, allowing them to eventually increase the load and progress to more advanced programs.
Keep in mind that strength training is a process and it takes time. As good habits are created your athletes will gain a competitive advantage.